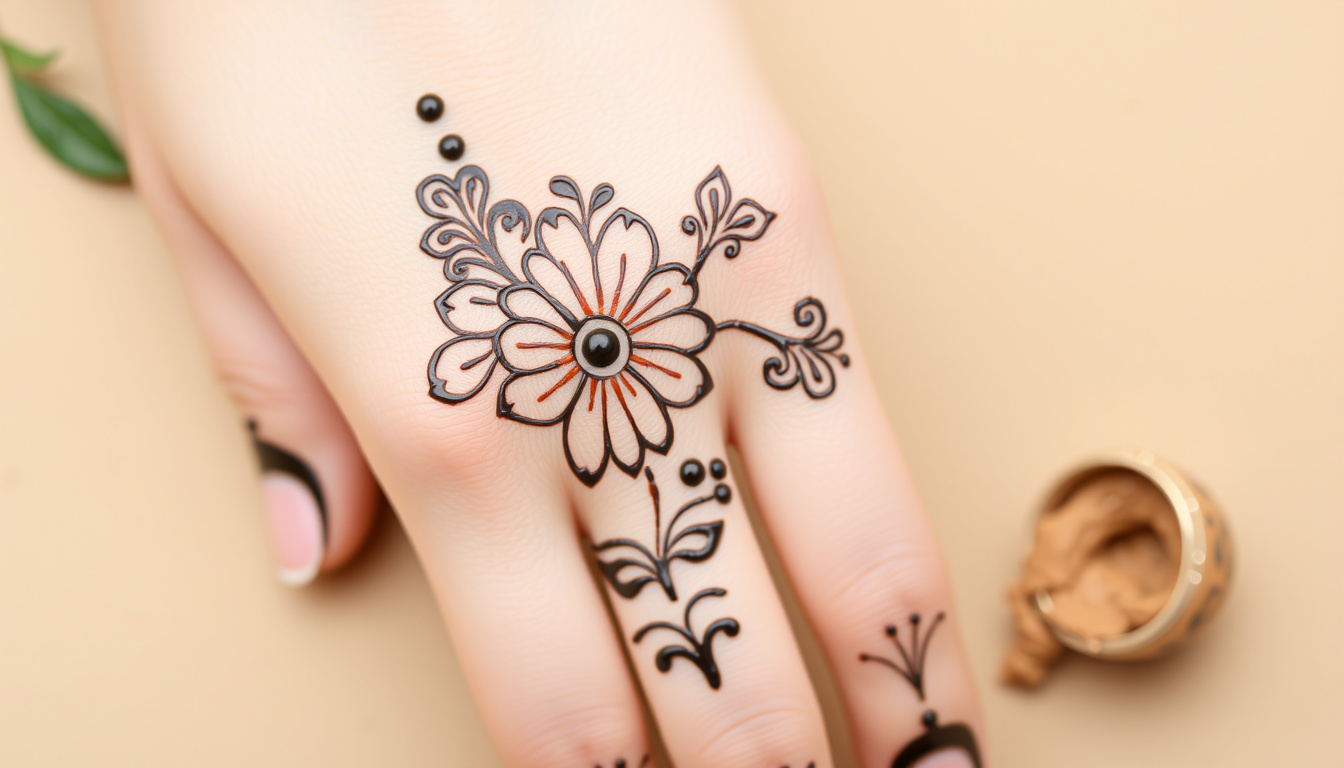
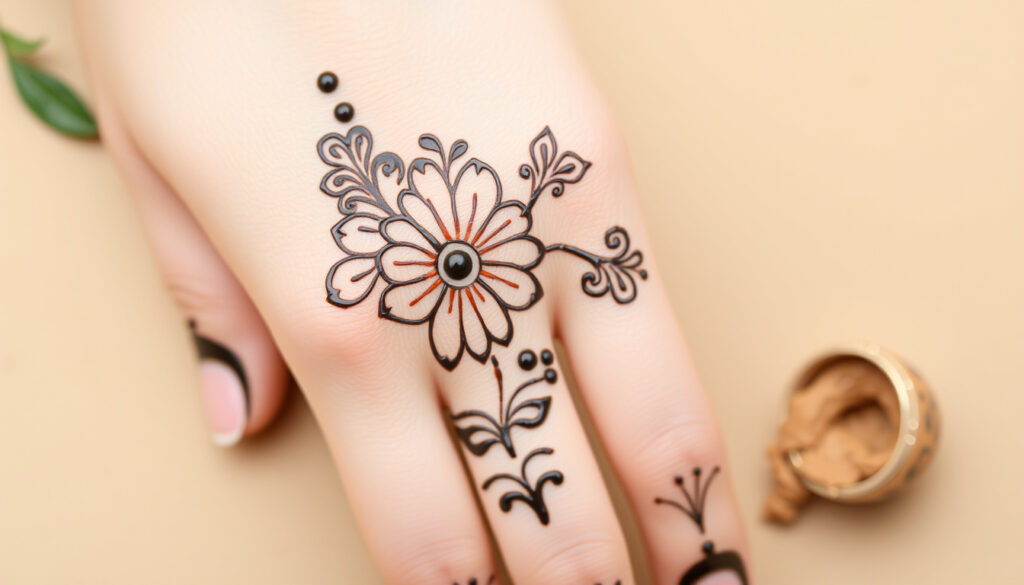
There’s something satisfying about watching a few simple dots and lines turn into a beautiful henna pattern on your skin. You don’t need years of practice to create a lovely mehndi design — the basic shapes are surprisingly easy to learn.
Mehndi paste natural color: brown to deep maroon ·
Average drying time for simple designs: 15–30 minutes ·
Beginner-friendly design elements: dots, lines, leaves, simple flowers ·
Primary henna ingredient: Lawsonia inermis plant leaf powder
Quick snapshot
- Dots and simple lines (Instructables henna tutorial)
- Small leaves and vines (Instructables basic shapes)
- Single central flower (Instructables flower pattern)
- Basic geometric shapes (Instructables design comparison)
- Look for ‘natural’ or ‘organic’ labels (YouTube henna safety advice)
- Check expiry date for freshness (YouTube mehndi class tips)
- Fine tip for control (YouTube beginner cone tips)
- Avoid cones with strong chemical smell (YouTube henna safety advice)
- Natural henna stains brown, not black (FDA: natural henna color)
- Avoid black henna containing PPD (FDA warning on black henna)
- Do a patch test 24 hours before (FDA patch test recommendation)
- Redness or itching means allergic reaction (FDA allergic reaction signs)
- Practice on paper first (Instructables practice method)
- Use stencils for pattern ideas (YouTube stencil tips)
- Start small (e.g., one flower) (Instructables flower pattern)
- Let paste dry completely before removing (Instructables drying advice)
Four key facts set the foundation for safe and easy mehndi application.
| Label | Details |
|---|---|
| Main ingredient for safe henna | Lawsonia inermis leaf powder (Wikipedia: Henna plant) |
| PPD presence indication | Immediate black stain (FDA: black henna risks) |
| Average beginner design time | 10–20 minutes per hand |
| Peak color after paste removal | 24–48 hours (Instructables henna care) |
| Henna stain color range | Brown to deep maroon (Wikipedia: Lawsonia inermis) |
| Basic strokes to practice | Six shapes: dots, lines, curves (C, U, S, O), hearts, leaves (Instructables basic shapes) |
| Drying time before removal | 4–6 hours for best stain |
| PPD legal status for skin | Illegal in EU and USA for skin application (FDA: PPD restrictions) |
Which mehendi is best for beginners?
The simplest mehndi designs use motifs that are easy to control with a cone. Beginners should start with dots, lines, and basic curves before attempting full patterns. According to the Instructables henna tutorial (step-by-step guide), drawing designs with a pen first and then overwriting with henna builds confidence.
What are the easiest mehndi designs for beginners?
- A single central flower on the palm — made with a dot and surrounding ‘C’ and ‘U’ shapes (Instructables flower pattern)
- Small leaves and vines along the fingers (Instructables leaf and vine guide)
- Basic geometric shapes like diamonds and triangles (Instructables shape tutorial)
- Fill-up patterns using repeated curves and dots (YouTube fill-up design tutorial)
A beginner-friendly design uses fewer, larger elements — it takes 10 to 20 minutes to complete a simple hand pattern.
How to draw a cute mehndi?
Cute mehndi designs often feature small, spaced motifs: tiny flowers, hearts, or simple geometric shapes. Many YouTube mehndi playlists (easy design collections) show how even a single flower with dots around it can look adorable. The trick is to keep the pattern airy — not too dense — so each element stands out.
Starting with cute, spaced patterns reduces pressure and gives you room to practice stroke control. The result still looks intentional and pretty.
Which is the best mehndi cone?
A good cone makes all the difference for a beginner. The paste should be fresh, and the tip fine enough to draw delicate lines. Look for cones labeled “natural” or “organic” to avoid chemical additives. YouTube mehndi class tips (beginners) recommend checking the expiry date and smelling the cone — a strong chemical odor signals artificial ingredients.
While Neeta Mehndi Cone is a widely recognized brand, any fresh cone from a reputable supplier works well. The key is consistency: the paste should flow smoothly, not blobs or clumps.
Selecting the right cone requires attention to a few specific features.
| Feature | What to look for |
|---|---|
| Label | “Natural” or “organic” on packaging (FDA: natural vs. black henna) |
| Freshness | Check expiry date; paste should be pliable, not dry (YouTube freshness test) |
| Tip size | Fine tip for detailed lines (test on paper first) |
| Smell | Earthy, herbal scent — not chemical (YouTube smell warning) |
| Stain test | Natural henna stains orange-brown, not black (FDA stain test) |
The trade-off: a cheaper cone may have a wider tip or stale paste, making it harder to control. Investing a little more in a quality cone saves frustration and gives a better stain.
What color henna is safest?
Brown henna from the natural Lawsonia inermis plant is the only safe choice for skin. The stain it produces ranges from orange-brown to deep maroon. Black henna, on the other hand, often contains PPD (paraphenylenediamine), a chemical approved for hair dye but illegal for skin application in many countries, including the EU and USA. The FDA (U.S. Food and Drug Administration) warns that black henna can cause severe allergic reactions, permanent scarring, and even long-term sensitization to chemicals.
What is the difference between brown and black henna?
- Brown henna: stains orange-brown to deep maroon; safe; derived from Lawsonia inermis leaves (Wikipedia: henna composition)
- Black henna: stains black immediately; often contains PPD; illegal for skin in many regions; high risk of allergic reactions (FDA: black henna risks)
If a cone claims to give a black stain, that’s a red flag. Natural henna takes hours to darken and never turns truly black.
Which mehndi style is best?
Different mehndi styles suit different preferences and skill levels. For beginners, some patterns are naturally easier to execute.
| Style | Characteristics | Best for beginners? |
|---|---|---|
| Arabic | Floral, flowing patterns with spacious gaps; uses bold lines and curves | Yes — spaced designs reduce pressure; easy to correct small mistakes (Instructables style comparison) |
| Indian | Dense, intricate patterns covering the hand; many fillers and small details | Moderate — requires control for dense fillers; but floral motifs are simple to learn |
| Pakistani | Mix of Indian and Arabic; bold lines with delicate details | Moderate — similar to Arabic but often more coverage |
| Minimalist / Negative space | Large areas of skin left bare; thin, clean lines | Yes — very few strokes; emphasis on placement not density; trendy |
Arabic mehndi is generally the easiest for a beginner because the open layout lets you work slowly without worrying about overlapping elements. Instructables’ beginner guide notes that Indian-style fillers can be added later as you gain confidence.
For a first design, pick Arabic or minimalist styles. They look elegant with just a few basic shapes — and they forgive small wobbles.
The pattern: Arabic and minimalist styles lower the entry barrier, letting beginners produce satisfying results without years of practice.
Is mehndi only for Muslims?
No, mehndi is used in many cultures and religions. It is a traditional art form in Hindu, Sikh, and Jewish celebrations, as well as in South Asian, Middle Eastern, and North African weddings and festivals. Wikipedia on mehndi traditions explains that the practice predates Islam and is deeply rooted in regional customs rather than religious exclusivity.
That said, mehndi has special significance at Muslim weddings (especially during the henna night or mehndi ki raat), but it’s far from limited to one faith. The design styles vary by region, but anyone can enjoy mehndi as a form of artistic expression.
How to draw a cute mehndi?
A cute mehndi design usually involves small, cheerful motifs spaced apart. Here’s a quick overview of what makes a design “cute”:
- Tiny flowers with five petals (made with ‘U’ shapes)
- Teardrop leaves
- Hearts and dots
- Simple vine curves
Many YouTube Shorts tutorials (easy henna designs) show designs that take just 5–10 minutes. The key is to use light pressure and let the cone glide naturally.
Upsides of simple designs
- Fast to apply (10–20 minutes)
- Low risk of mistakes
- Easy to practice individual strokes
- Natural, airy look that suits casual occasions
Downsides of simple designs
- May look less “intricate” for traditional events
- Some find them too sparse
- Requires clean, confident lines (even if simple)
Step-by-step guide to simple mehndi designs
Follow these steps to create your first real design. Practice each stroke on paper before using the cone.
- Draw a central flower on the palm. Start with a dot in the middle, then circle it with a ‘U’ shape for petals. Use five ‘U’s to make a flower (Instructables flower step).
- Add leaves and vines. Draw teardrop-shaped leaves around the flower. Connect them with curved ‘S’ lines.
- Extend to the fingers. Add thin vertical lines along each finger, with small dots or leaf shapes at the tips.
- Fill empty spaces. Use small dots, short curves, or tiny circles to fill gaps. Keep it light — don’t overcrowd.
- Let the paste dry for 4–6 hours. Avoid touching it. Once dry, scrape off the dried paste gently — do not wash with water immediately.
- Wait 24–48 hours for the final color. The stain will darken over the next day or two.
If you’re nervous, YouTube mehndi playlists for beginners show the entire process in slow motion.
Confirmed facts
- Henna (Lawsonia inermis) produces a brown to maroon stain (Wikipedia: henna plant)
- PPD in black henna is approved for hair dye but illegal for skin application in the EU and USA (FDA: PPD restrictions)
- Simple mehndi designs use fewer, larger elements than intricate patterns (Instructables design comparison)
- Basic strokes include dots, slant lines, curves (C, U, S, O), hearts, and leaf-like drops (Instructables basic shapes)
- Mehndi is used in Hindu, Sikh, and Jewish traditions, not only Muslim (Wikipedia: mehndi cultural use)
What’s unclear
- The exact PPD concentration in various commercial ‘black henna’ cones is not publicly reported.
- Individual skin reactions to natural henna vary; patch testing is recommended but not always done.
Expert perspectives
“Consumers should be aware that black henna is not approved for use on the skin. It can cause severe allergic reactions, including blisters and permanent scarring.”
FDA (U.S. Food and Drug Administration)
“The best way for a beginner to learn is to practice basic strokes on paper first. Dots, ‘C’ and ‘U’ shapes build the foundation for almost every design.”
Instructables henna tutorial (step-by-step guide)
“Arabic mehndi is ideal for beginners because the patterns are spaced out. You don’t need to fill every inch of skin.”
YouTube mehndi tutorial playlist (easy designs)
“Always use fresh, natural henna cones. A chemical smell is a red flag — it probably means artificial additives that can harm your skin.”
YouTube mehndi class day 1 (safety tips)
For beginners starting their mehndi journey, the choice is clear: practice basic strokes, pick a natural cone, and avoid any product that claims a black stain. Your skin will thank you, and your designs will naturally improve with each try.
Frequently asked questions
How long does simple mehndi last on the skin?
Simple mehndi designs typically last between 5 and 14 days, depending on skin type, aftercare, and the quality of the henna paste. The color darkens over the first 48 hours and then gradually fades.
Can I remove mehndi paste faster?
You can gently scrape off the dried paste after it has stayed on for at least 4–6 hours. Avoid using water immediately; oil or lemon sugar helps if it’s stubborn.
What is the difference between Arabic and Indian mehndi?
Arabic mehndi uses spaced-out floral motifs with bold lines, while Indian mehndi features dense, intricate fillers covering the entire hand. Arabic is easier for beginners.
Is mehndi safe for kids?
Natural henna is safe for children, but black henna containing PPD is not—it can cause severe allergic reactions. Always use natural henna and do a patch test first.
What oil should I apply before mehndi for a darker stain?
Eucalyptus oil or mustard oil is commonly applied to the skin before henna application to prepare the skin and deepen the stain. Tea tree oil also works.
How can I make my mehndi stain darker at home?
Keep the paste on for at least 4–6 hours, avoid washing with water immediately after removal, and apply a heat pack or lemon-sugar mix to boost the color.

Priya Mitchell leads fact-checking, source verification and corrections at Australia Data.